Do changes to your shared Excel workbooks feel like a time consuming game of Whodunit? Sometimes too many helping hands makes it difficult to spot changes. There’s an easy solution! Track Changes will highlight and give details for every change made to the workbook.
Before we jump into the steps, here’s a few important things to know before tracking changes:
- Save a backup! Change history will not automatically restore earlier versions of your workbook. You can use the history worksheet to input the original data in the shared workbook, but a backup will save you time.
- Changes that you make to cell contents are tracked, but other changes, such as formatting changes, are not tracked. Also some Microsoft Excel features are unavailable in shared workbooks, and therefore cannot be tracked.
- When you turn on track changes, the change history is kept for 30 days. You can increase or decrease the number of days of change history that you want to keep, or you can make periodic copies of the history information.
- Change history is periodically deleted. For example, if you are keeping 30 days of change history, and you open a workbook for the first time in two months, you will be able to view the history from two months ago. However, when you close this workbook, the history from the previous 30 days is deleted.
- Finally, when you turn off Track Changes or stop sharing the workbook, all change history is permanently deleted.
All right, let's get to it!
1) To track changes, click Review and in the Changes group, click Track Changes. Then select Highlight Changes.
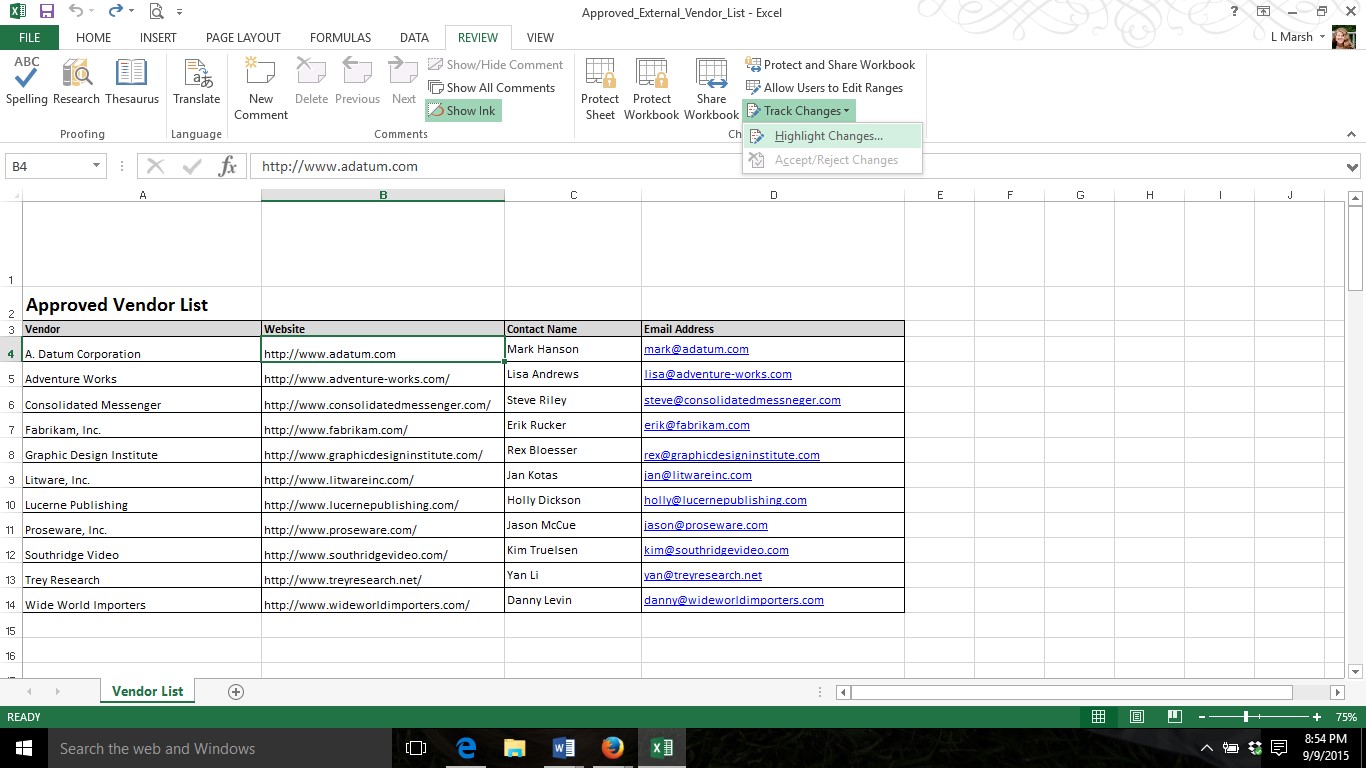
2) In the Highlight Changes dialog box, check the box for Track changes while editing. When you track changes, your workbook shifts to a shared workbook, or a format designed for concurrent use by multiple people on a network. But you don’t have share it with everyone. You can share a notebook even if you’re the only user.
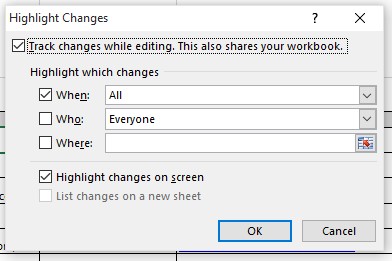
3) Use the When, Who, or Where boxes to specify tracking to a particular time frame, user, or cell range respectively.
4) Click Highlight changes on screen so that when changes are made they’re flagged in the workbook.
5) With Track Changes you have the option to list changes on a separate history worksheet. The history worksheet comes in handy when you want a printable list of changes or when a workbook has a ton of changes you want to review. To create a separate sheet, you click OK to close the dialog box. Open the dialog box again to check List changes on a separate sheet. Click OK. (If prompted, save the workbook. Only saved changes will be listed on the history worksheet.)
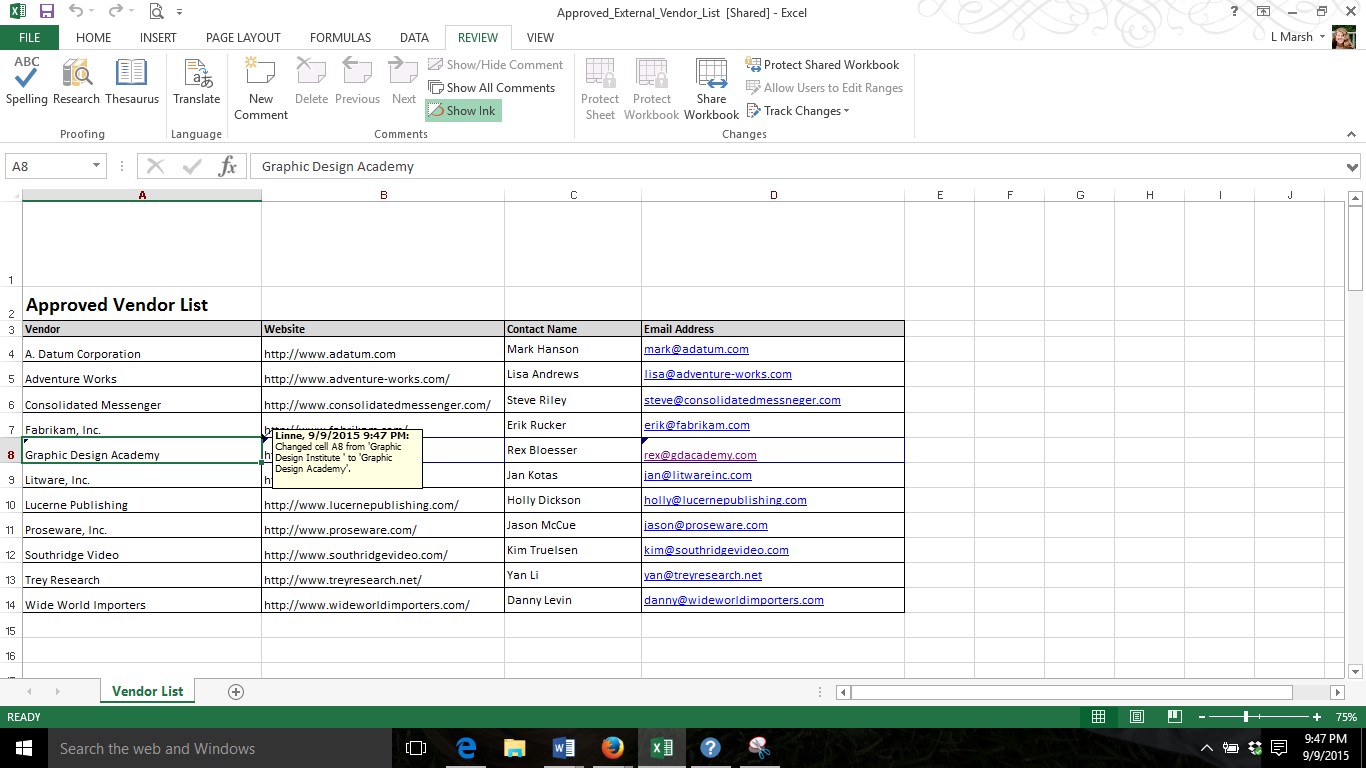
6) When changes are made to the workbook, you can place the mouse cursor over the cell to see details about the change.
7) To review the changes in the workbook, you click the Review tab and then Track Changes. Then select Accept or Reject Change. (If prompted save the workbook.)
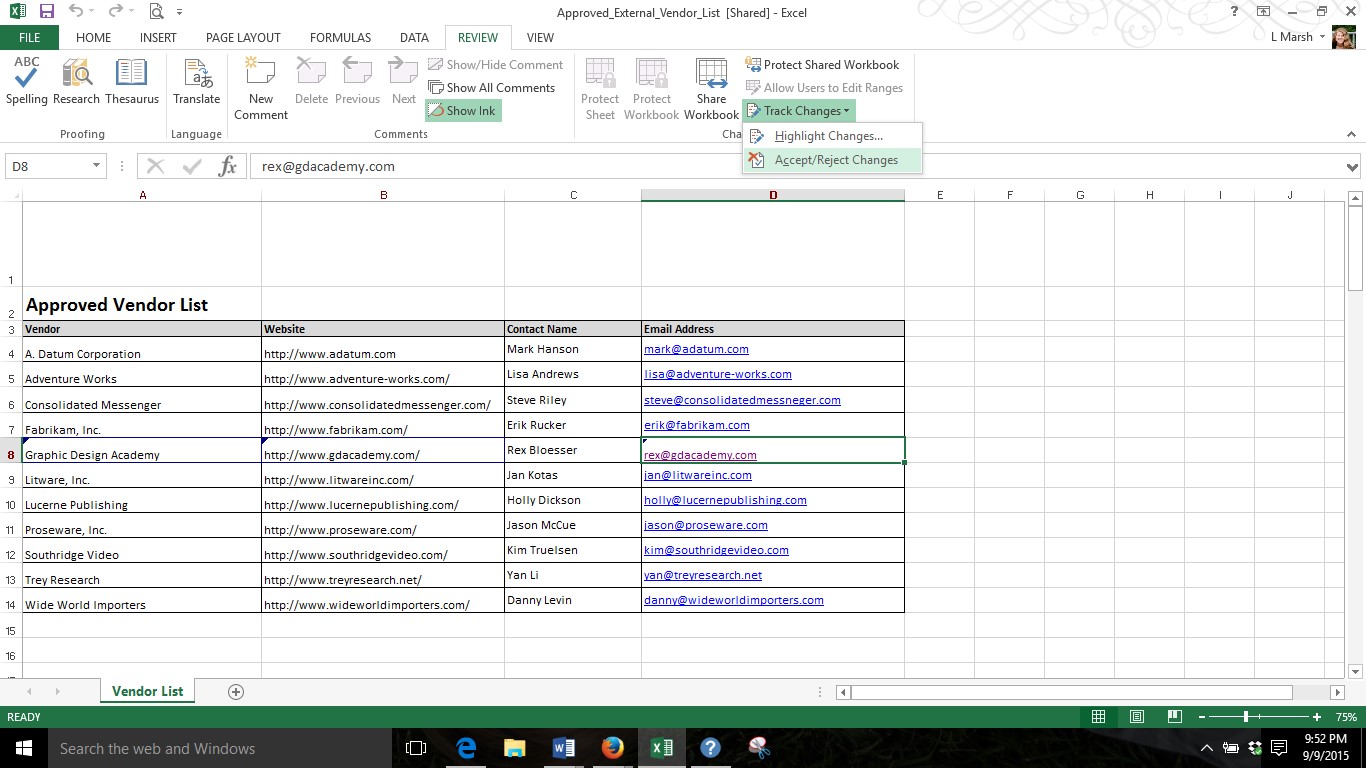
8) In the Accept or Reject Change dialog box, you can narrow the search range to find specific changes according to When, Who, or Where they were made. Click OK.
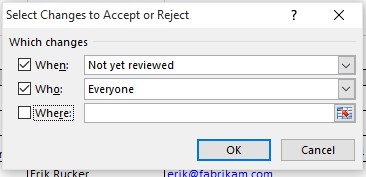
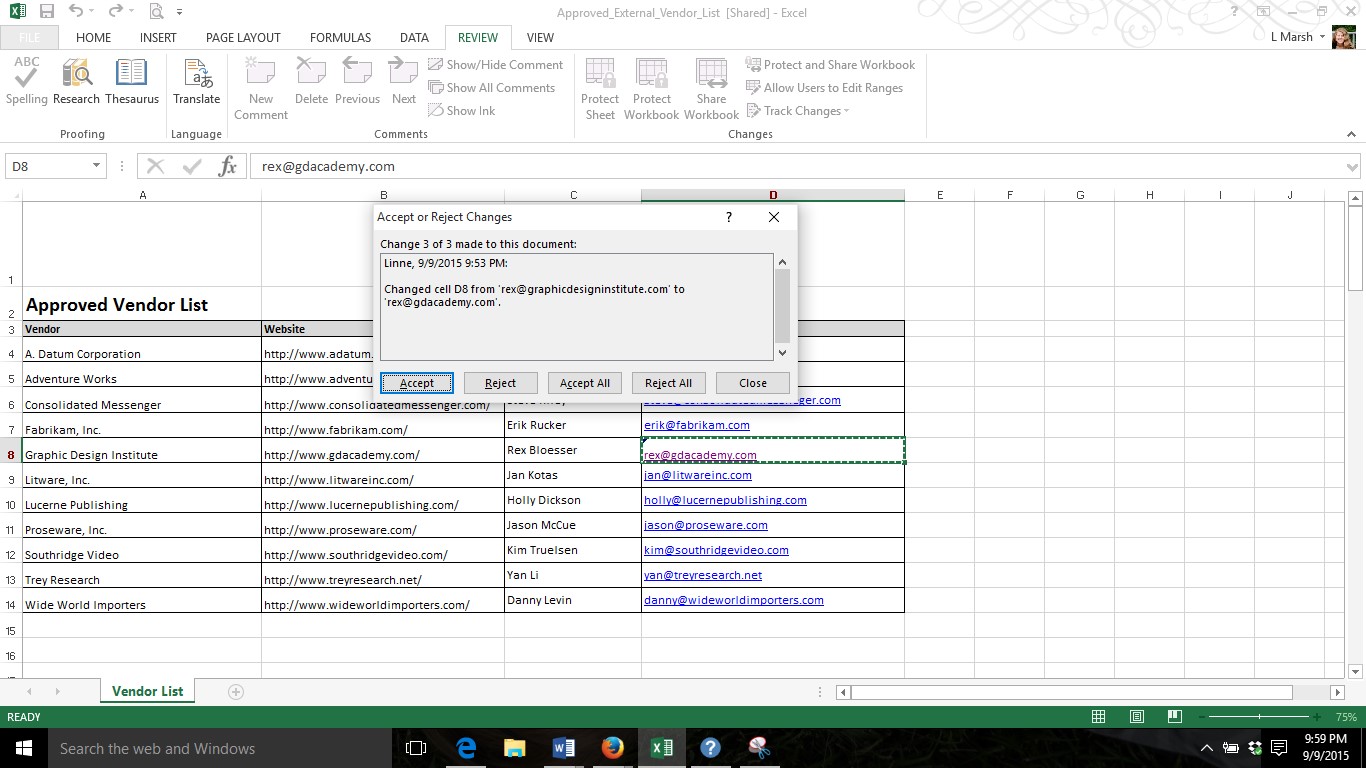
Now in the Accept or Reject Changes dialog box, you can go through each of change to see if you’d like to keep it or ditch it. When you click Accept, the change is unflagged. When you click Reject, the change reverts to the original mark up. If you know the changes are all correct, you can save time reviewing by clicking Accept All. When you’re done, click Close.
Track Changes eliminates the mystery. Now you’ll know whodunit, when they did it, and what they did. Just one more way Microsoft Excel makes it easier to collaborate.
 <
<