In a world filled with meetings, it’s understandable to forget a detail or two. Did your manager assign you or Greg to follow up with the customer? Where did the team agree to save their project files?
Luckily, you don’t have to have a photographic memory to access that information. When you record a Skype for Business meeting, you can play back audio, video, instant messaging, screen sharing, PowerPoint slides, whiteboard activity, and polling. Nothing is off limits.
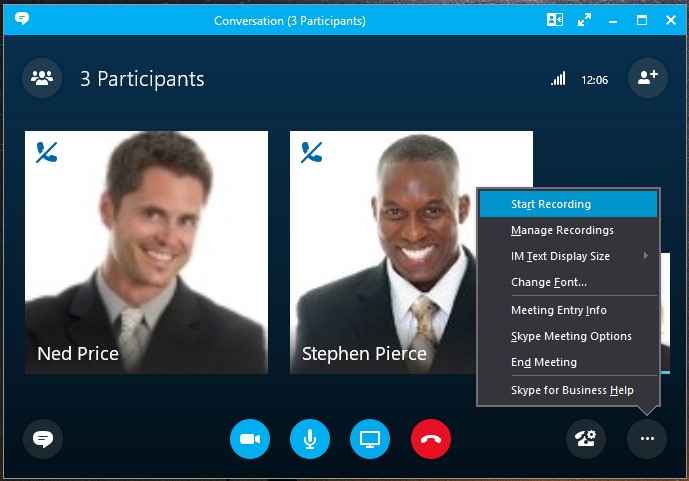
To make this happen, you click the Options button, and select Start Recording. (If Start Recording is dimmed, your audio might be disconnected. Click the mic icon to connect audio and try again.)

At the bottom of the meeting screen, you can use the controls to pause, resume, or stop the recording.

When the meeting is over click Stop Recording. The recording is automatically saved in MP4 format which will play in Windows Media Player.
When you’re ready to revisit or share your recording, click the Show Menu button and select Tools | Recording Manager. To play the recording, just select it and click Play. If you want to share your recording, select the recording and click Browse to see where the recording is saved. From that file location you can copy it to your OneDrive account or email it to your colleagues.
Meeting recordings will keep you sharp and ready to deliver on everything discussed in your Skype for Business Meetings.
